What is the Best Sewing Awl? Customers might easily become disoriented in the face of so many choices. There are too many options, including low-quality knockoffs, on the market today.
If you’re looking for a product, you may rely on the advice of our professionals.
To assist you select the Best Sewing Awl brand, we examined all the features and came up with a list of ten possible purchases. For the best, we looked at the materials and designs, as well as the reviews of experts and customers to find the Best Sewing Awl
Detailed performance data and recommendations are included in the review. Find out which option is most suitable for you.
10 Best Sewing Awl: Editor Recommended


10 Best Sewing Awl Review:
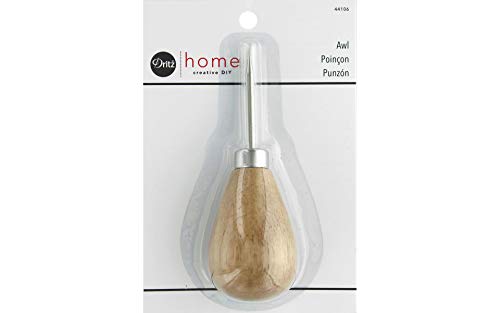
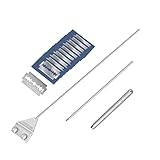
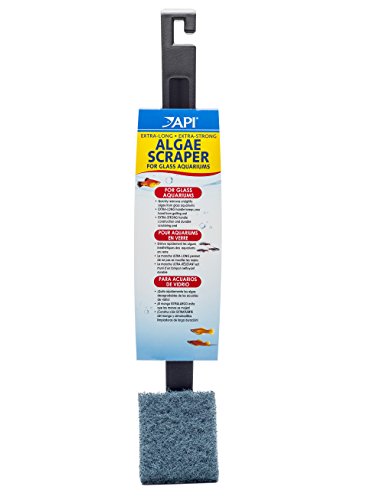
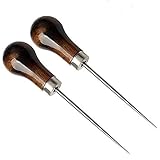
Dritz Home 44106 Awl with Wooden Handle
Features
- Start holes for small wood screws, screw eyes or tieback hooks
- Mark hole positions for hanging window treatments
- Punch holes in leather and plastics
- Features a wooden handle

12 Pieces Leather Sewing Awl Kit Hand Stitcher with Craft Accessories Set, Hand Awl Tool, 3 Sizes Needles and 8 Colors Replacement Spools of Thread, Stitching Awl Tool Kit for Leather Fabric Supplies
Features
- Practical package: the leather sewing awl set includes 1 x hand stitcher with 11 pieces craft accessories: 1 pieces awl adjusting tool, 3 sizes needles(1 long, 1 short, 1 curved) and 2 kinds of replacement spools of thread in 8 colors (flat wax thread: white, black, brown, coffee; round wax thread: white, black, cream, multicolored), 12 pieces in total
- 2 Kinds of replacement thread: round thread is easier to operate for novice sewing, but with the extension of service time, the thread on the surface of leather goods is easy to wear; The service life of flat thread is longer than that of round thread and it is more beautiful, also provide you multiple colors to choose from
- Useful tools: the package comes with three kinds of needles, one long, one short and one curved, which can meet your different sewing needs; They can be stored in the bottle body of stitcher sewing awl and can be applied at any time; And a wrench tool is also included to help you change thread, saving your time and energy
- Easy to operate: our leather stitching tools contain a manual for you to refer to whenever you encounter problems; The stainless steel piercing needles and waxed enough quantity thread for you to change or replace, helping you quickly and easily sew every time
- Multiple usage: this hand stitching sewing awl set will be essential assistant for leather crafts; It is ideal for quick belt repair lockstitch, DIY craft, leather, heavy fabric, canvas, bags and other stitched objects, fix military uniform, leather shoes, leather bags, tents, camping gear, sail boat, saddle, awning, tarp repairs, hunting and fishing gear and so on

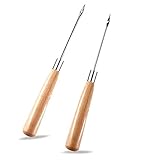
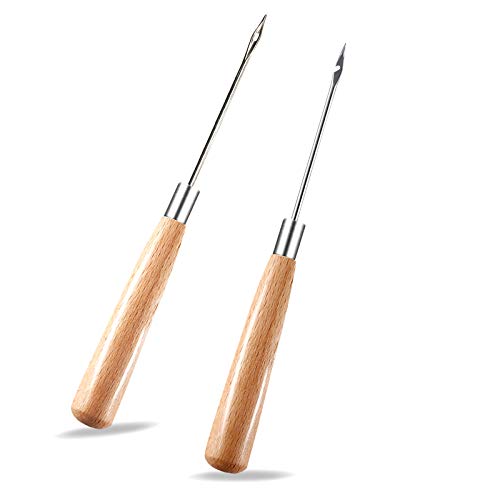
VIUJUH 2 Pack Awl,Gourd Shape Awl Tailors Awl Wood Handle Scratch Awl Sewing Awl Tool for Leather (2 Pack)
Features
- This awl is made of high quality metal and log, not easy to deform
- Comfortable handling of log handle
- The taper head is thin and has a wide range of uses
- Handle: 0.9 ", taper head: 3.6"
- Pure hand polishing, unique process, very smooth, not only brings you the fun of crocheting, but also makes you experience the feeling of flying needle

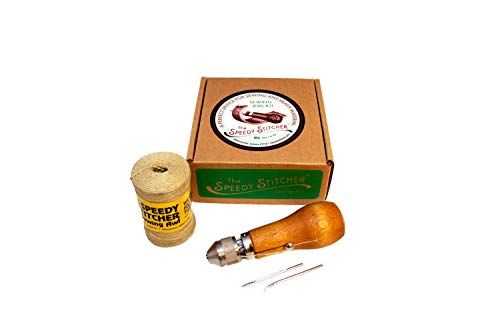
Speedy Stitcher Sewing Awl
Features
- Quickly And Easily Sew Any Heavy Material
- Includes Sewing Awl, Straight Needle, Curved Needle, Thread
- Features Wood Handle
- Great For Use At Home, Camp, Farm, And Much More

12 Pieces Portable Sewing Awl Kit,Stitching Awl Hand Stitcher Repair Tool Kit for Leather, Heavy Fabrics and Canvas with Needles(Straight and Curved), Coil and Waxed Threads for DIY Process
Features
- Package Include -1 X Leather Sewing Awl. -2 X Straight Needle -2 X Curved Needle -6 X Waxed Thread (Black,White,Beige,Pink,Brown,Grey) -1 X Screw Driver Warm Notice:The needles are sharp,keep them away from children!
- Product Features - Features wood handle great for use at home, camp, farm, and much more. - Small enough to fit in your pocket or tool bag. - Nneedles can be stored inside the wooden handle when not in use, making it safe and easy to store. - With a little practice, it sews a perfect lock stitch every time,just like a sewing machine.
- Safe Material-The sewing cone is made of wood and metal, and the handle has a comfortable grip. The tapered needle is made of stainless steel material, which is rust-proof and not easy to bend.
- Multiple Uses - The sewing tools can be applied to a variety of sewing needs, perfectly matched with leather crafts, suitable for repairing leather, heavy fabrics, bags, camping equipment, leather shoes, leather clothing, fishing gear and other sewn objects, it is handmade DIY Ideal choice.
- Great Gift - Ideal tools for DIY leather and sewing. - It is the most surprising gift for your family and friends.
Zxiixz 2 PCS Awl, Leather Sewing Awl with Wood Handle, Hollow, Speedy Stitcher Sewing Awl for DIY Leather Sewing & Stitching
Features
- Material: Made of a wooden handle and metal needle, easy to operate, smooth handle enhances user experience and it is great for sewing.
- Multiple Sizes: 2 pieces leather sewing awl, including long hollow awl and elbow awl, different styles have an auxiliary role in the sewing process.
- Function: In the sewing process, it helps to perforate and shape. It is necessary to sew a cross stitch, paper, etc.
- Easy to Use: Simple awl sewing tool, easy to use, keep out of reach of children.
- Widely Application: Can be used for sewing, DIY hand punching, perforated leather, clothing, etc.
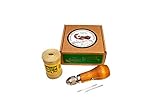
Speedy Stitcher Sewing Awl Kit with 180-yard Tube of Thread, Natural
Features
- Includes the genuine Speedy Stitcher Sewing Awl, 4 needles - 2 straight and 2 curved, and a 180-yd tube of coarse thread
- The only heavy duty hand sewing tool that can sew any heavy material such as canvas, leather, tarp, or sails
- A must-have tool for any emergency repair situation
- Crafted from the highest quality materials
- Great for quick repairs to straps, bags, tents, backpacks, sleeping bags, upholstery, saddles, harnesses and other stitched items
BeeSpring Leather Sewing Awl Wood Handle Drillable Awl Pin Punching Hole Maker Stitching Overstitch Sewing Awl Kit
Features
- The Needles are sharp, Please keep them away from children
- Product total length: 120mm; the needle length: 62mm.
- Stainless steel awl with wooden handle.This handle is comfortable to handle .
- It can make a hole size from 1mm up to 9mm. Suit for leather paper or cloth DIY.
- This is great tool for sewing or repairing canvas leather, shoes, soles, bag, more convenient for household
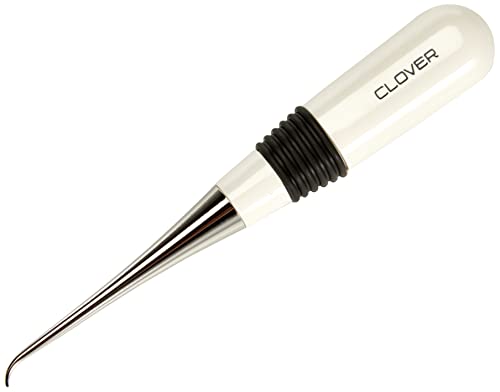
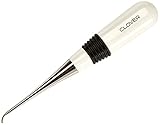
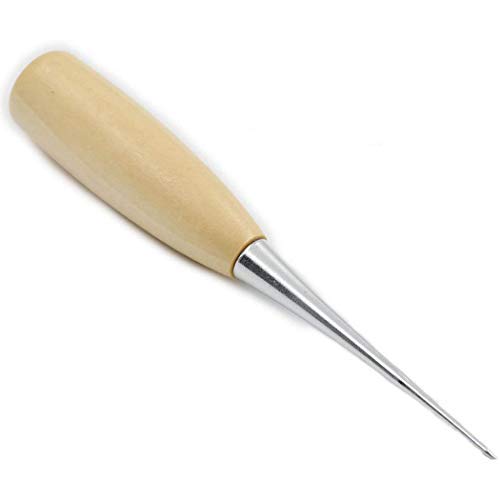
Clover 4880 Curved Awl for Sewing,White/Silver
Features
- Ergonomic handle
- Curved tip ensures more visibility while in use
- Easily get under seams or stitches
- Country of origin: Japan

WILLBOND 12 Pcs Sewing Awl Kit Portable Leather Sewing Awl Kit Including Handheld Sewing Repair Awl Straight and Bent Needles and 8 Rolls Waxed Threads with Small Screwdriver for DIY Craft
Features
- You will get: the package contains 1 piece of sewing awl with 2 pieces of needles (1 straight and 1 bent), 1 piece of small screwdriver and 8 rolls of waxed threads (approx. 30 meters/ 32.8 yards long of each roll), diverse tools and enough quantity of threads can meet your different needs of sewing
- Rich colors of threads: waxed threads consist of 8 colors, including black, dark gray, brown, dark brown, light khaki, khaki, dark khaki and apricot, plentiful colors can be matched with your leather crafts in different colors, providing you many options
- Reliable material: the portable leather sewing awl is made of wood and metal, and the polished wooden handle can bring you a comfortable grip experience; And the needles are made of stainless steel material, not easy to break or rust, each one can be applied for a long time
- Easy to use: you can cut the waxed thread into different lengths as you need, and the needle eye is relatively large, which is convenient for you to thread quickly, and the specific installation instructions can be seen in the picture
- Wide application: these manual stitching sewing tools are suitable for leather repair, and can be applied for leather clothing, shoes, leather bags and tents, and are ideal choices for leather craftsman's daily use tools
Tips for Choosing Best Sewing Awl
For the most part, the products that are mentioned weren't specifically chosen for inclusion. AI created the list. Every product on this page has been tested, evaluated, and recommended by real individuals who have actually used it.
Cost
Cost and performance are essential factors to consider when acquiring a Best Sewing Awl. More enterprises entering the Best Sewing Awl market means more options for quality and performance. The most expensive Best Sewing Awl does not always indicate the best decision for you and your money. Many low-cost models offer excellent performance and comfort.
Branding
A brand with high-quality products and outstanding customer service is the ideal choice for Best Sewing Awl. You can always count on the manufacturer of a high-quality product to answer your inquiries, fix any problems, or refund your money if there is any damage to the goods.
Specifications
Make sure the product meets your needs before you click the “purchase now” button or add goods to your shopping basket.
When making a purchase, it's critical to consider the technical specifications. The product's capabilities are defined by them. It's critical to make the best choice among the numerous possibilities.
Choose the Best Sewing Awl precision-engineered to fit your demands.Aspects like performance, functionality, and price should all be taken into account when evaluating various specifications. In making your ultimate decision, you'll have to consider all of the factors listed above. You get the most value for your money if you take into account all of them.
Design
The world is filled of Best Sewing Awl, making it difficult to choose. Looking at the design might help you make a decision. Material selection, color scheme, and even visual weighting all have an impact on how well a product looks in its final form.. You can find a product that exactly matches your preferences and requirements by being aware of this.
Customer Ratings
While making a purchase decision, many people take into account customer feedback. For obvious reasons: after all, who knows a product better than its own users? Looking through customer reviews before making a purchase decision can offer you a decent idea of what other people thought of their experience with the goods. Some people are more inclined to leave a review than others for a certain product. Customers' overall satisfaction with a product can be gauged from their product reviews.
Stability and Control
We weighed the stability and control of a Best Sewing Awl in determining its performance.
Stability and control should be considered.
We think about how using the product will make us feel and how it will change our life.
Comfort
When doing what they love, no one wants to feel restricted or uncomfortable. When making a decision on whether or not to employ a particular product, consider its comfort Best Sewing Awl. There are various sorts of Best Sewing Awl that provide stability, control, and comfort. No one wants to spend their entire fishing trip wishing they could get out because their back or feet hurt. That's why fishing kayaks are so popular.
Durability
The manner a Best Sewing Awl is designed and built, as well as the material used, determine its durability. Select the Best Sewing Awl that can tolerate wear, pressure, and damage.
Also, be certain that it has a sleek design that will go with anything. Because this device is built to last, busy mothers or construction workers will find it useful.
What Are Today’s Most Popular Best Sewing Awl Models?
There are many Best Sewing Awl items accessible today for men and women seeking quality and reliability. Every Best Sewing Awl model follows the same essential premise. But they appeal to various users.
Inevitably, certain products will only appeal to particular types of people. Which products are the most popular amongst customers as a whole, you could ask. If you'd want a list, we have one here. Check out our wide range of products that look to be appealing to people of various ages, genders, and places.
How to Choose the Most Popular Best Sewing Awl?
There are three most important factors to keep in mind while deciding on a product: pricing, quality, and popularity.
One obvious consideration is price. You must make sure that the price matches your budget.
To get the greatest product, you need to pay attention to the quality of the things you are purchasing.
When it comes to acquiring new clients, popularity is just as important as pricing or quality, if not more so.
FAQ’s
1: How much is Best Sewing Awl?
Best Sewing Awl come in a variety of designs and pricing ranges. It’s difficult to predict product costs nowadays.Because the price range is so wide, you don't know how much something costs. For example, a pair of pants can range from $20 to $200 depending on where you buy them. Similarly, additional goods like as Best Sewing Awl.
2. Is Best Sewing Awl worth it?
We are, without a doubt, a disposable civilization. We’re continually assaulted with ads advertising the latest and greatest Best Sewing Awl. But are they Best Sewing Awl worth our money? Some of them are if you pick wisely! Some, not so much.
3. Is it time to get a new Best Sewing Awl?
You’re looking for a new Best Sewing Awl. Think about it. It's impossible to foresee pricing fluctuations in the future. The sooner you buy, the better off you'll be if manufacturing doesn't slow down. If, on the other hand, production is falling and prices are expected to climb, you might want to hold off on making a decision until the hype has calmed down.
4. What is the Best Sewing Awl?
I'm sorry if I've confused you. My sympathies go out to you! Even yet, it is one of the most important decisions you'll ever make. If you’re still unsure which type of Best Sewing Awl is best for you, I recommend comparing the characteristics and functionalities of the Best Sewing Awl listed above. Each has advantages and disadvantages.
5. Why should I buy a Best Sewing Awl?
You can tell if you need or want a Best Sewing Awl by looking at your existing inventory. You probably don’t need it and should reconsider buying it. If you can't bear to go with the old one, you could always sell it and put the money toward the purchase of a replacement.
Finishing your project in this manner is a lot of fun and simple to do.
Final Thoughts
We all want to feel good about our purchases, so let's face it. However, there are so many! Which one is the best? Leveller is on your side, so don't worry. We're here to help you discover what works best for you. You can take advantage of our free consultations before making a final decision.